Documentation
Frequently Asked Questions
This FAQ lists frequently asked questions about Coccinella. You should first check this list to see if your question already has been answered.
Can I use multiple accounts at the same time?
How can I connect to Google Talk?
- Contact ID: [email protected]
- Password: password_from_your_gmail_account
- Switch on "Use secure connection" in the Connection tab
- Select the "Use TLS and SASL" option
There is a second way:
- Contact ID: [email protected]
- Password: password_from_your_gmail_account
- Switch on "Use secure connection" in the Connection tab
- Select the "Use TLS on separate port (old)" option
- In the Login tab, enable the option "Plain text password"
- Host (Server tab): talk.google.com
- Port (Server tab): 5223
Note: as you do not need to register a new account with GMail, the above information either needs to be edited in the Profiles dialog, or in the Login dialog.
How can I connect to a Jabber server from work/school?
You are probably behind a firewall. Try to configure the HTTP proxy settings. In the profile page, click the HTTP tab and do the setup from there. You may ask a system admin for the proxy data, and you need to know the URL of the Jabber server you are connecting to. File transfers won't work at this stage.
How can I enter an IRC channel that only allows registered users (mode +R)
To enter an IRC channel that only allows registered users:
- Login to the intended channel as any other channel.
-
In the alternative channel that will be opened,
- Enter the command "/msg nickserv register <myPassword>" if your nickname is not yet registered.
- Enter the command "/msg nickserv identify <myPassword>" if your nickname already has been registered. Then return to step 1.
How to make Coccinella portable?
You can create a cross-platform portable Coccinella USB stick this way:
- Create a folder on the USB stick.
- Put in this folder the Coccinella binaries (for Windows, Linux and Mac OS X). Of course you do not necessarily need all binaries, for instance if you do not want to use the USB stick on Windows computers.
- Then open on each platform (Windows, Linux and Mac OS X) the binary for that platform.
- Go each time to Preferences and enable the checkbox option "Store preferences in same folder as program" (on the General page).
- Preferences will now be saved on the USB stick in the same folder as the binary.
Is Coccinella the best Jabber client?
This is a difficult question. Whether or not Coccinella is the best Jabber client (or XMPP client) depends on your opinion. Thus, you have to answer this question yourself by trying Coccinella. At least we are sure Coccinella is not the worst Jabber client.
Items I draw seem to get delayed and show up after a while. What can cause this?
In order to protect from denial-of-service attacks, some Jabber servers only accept a certain amount of data from each user. If you are running the server yourself you need to increase this maximul allowed amountin the configuration of your server. See the README file for detailed instructions.
On jabberd14, you can use these settings in the relevant section of the jabber.xml file.
If you are running ejabberd and you experience problems, you can try to increase the shaper value in the configuration of your server:
% Set shaper with name "normal" to limit traffic

speed to 1000B/s {shaper, normal, {maxrate, 1000}}.
Running from sources
Sometimes you would want to "run from sources", what is that and how do I do it?
Tcl/Tk is a scripting language and no compilation of source code is necessary. You can therefore run an application directly from the source code using a Tcl/Tk installation. Unix systems typically already have a Tcl/Tk installation. In any case you can install a free one from ActiveState. That pages can be hard to navigate and you can try a direct link. The first step is to get and install Tcl/Tk. The second step is to get the Coccinella sources, either a released version or directly from Subversion. On Mac OS X and Windows you start the wish application, which is what Tcl/Tk is called for some reason, pick the File/Source menu and select Coccinella.tcl in the Coccinella sources. There you go. On unix systems you typically do
cd coccinella/
chmod u+x Coccinella.tcl
./Coccinella.tcl
If you want an interactive console you do
cd coccinella/
wish
source Coccinella.tcl
instead.
On Mac OS X it is not recommended to use the wish console that is built into Tcl/Tk, but instead run wish from the Terminal. The reason is that the wish console renders its output using ATSUI which can be extremely slow for large texts.
Under which operating systems does Coccinella runs?
Coccinella runs under all systems where Tcl/Tk works, for instance, Windows (any but CE), Mac OS X 10.2 and higher, Linux (all distributions, I think), and most other Unix-like operating systems that I know of.
There also is a limited list of system requirements.
Voice over IP (VoIP) Questions
Is VoIP supported?
Yes, Coccinella supports Voice over IP using Jingle. The Speex codec is used by default. Coccinella uses the iaxclient library for internet telephony.
Is video conferencing supported?
No, video conferencing is not yet supported.
Is Coccinella's VoIP compatible with Google Talk?
No, currently Coccinella only supports IAX, which is not (yet) supported by Google Talk. So, you cannot yet receive calls from or make a call to people using the Google Talk client.
Can Coccinella be connected to an Asterisk server?
Yes, since version 0.96.19 (current development version) you can connect your Coccinella client to an Asterisk PBX, using the IAX2 protocol. On your Asterisk deployment, configure an IAX2 user similar to the following example:
[100]
type=friend
username=100
secret=MyPassword
context=default
host=dynamic
qualify=yes
callerid= John Doe
Subsequently, enter the following information in Coccinella in the IAX Account preferences:
- Username: 100
- Password: MyPassword
- Host: hostname or IP address of your Asterisk PBX
- Caller ID number: usually 0
- Caller ID name: John Doe
Whiteboard in SVG mode
There is a test implementation of the SVG protocol for the whiteboard. It is still in its infancy and will get a major rewrite when my tkpath package will be used for all whiteboard graphics. So stay tuned.
First, you need to be able to run from sources. Secondly, you need to specify some command line arguments. On unix you just do
./Coccinella.tcl -jprefs_useSVGT 1 -prefs_trptMethod sipub
but on Windows and Mac you first start the Wish program, then in the console window write
set argv "-jprefs_useSVGT 1 -prefs_trptMethod sipub"
and then File/Source and pick Coccinella.tcl.
It is possible that this also works for the binaries if you start then from a shell (DOS on Windows).
Images are now transported using the so called sipub protocol which just plugs into the standard xmpp way of transporting files, which have the ability to penetrate NATs and firewalls if the server has a bytestreams proxy service. Actually, a barrier on one side is handled without any additional proxy server support.
Why can't I add jisp emoticon sets?
The zip support built into Coccinella seems to be touchy about various zip archive formats. Use the linux/unix zip utility which presents itself as "Copyright (C) 1990-2005 Info-ZIP" when you run 'zip' and then do:
unzip Cool.jisp
zip -r Cool.jisp Cool
Why do I need Coccinella?
Coccinella is a communication tool, something like a chat program combined with a drawing program, but with a lot of additional features.
Why does Coccinella crashes when run from sources?
If you run Coccinella from sources and a Tcl/Tk installation and it crashes just when the splash screen is finished it is likely the buggy Img package in the Tcl/Tk installation. Find the package typically at:
- Windows: C:/Tcl/lib/Img1.3
- Linux: /usr/local/ActiveTcl/lib/Img1.3
- Mac: /Library/Tcl/Img1.3
Why is it called Coccinella?
Coccinella is latin for Lady Bug, or actually, Coccinella septum punctata. But since Coccinella hasn't seven dots on it, and since I wanted a shorter name, I found Coccinella appropriate. But why a bug you may ask? Kind of geek joke, I found them in my code, but I hope that there are less left. ;-)
Add AIM Contact
- To add an AIM contact, press the Contact button.

- Select AIM as chat system.

AIM Transport Registration
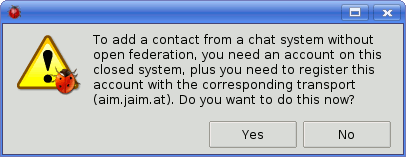
These steps are only for when you have not yet entered your AIM account in Coccinella.- Click on Yes.
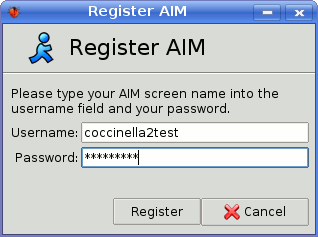
- Enter your AIM screen name and password. Click on Register.
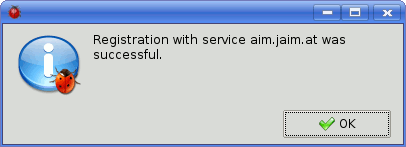
- Click OK to close the notification.
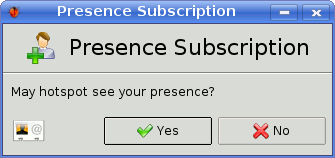
- Click Yes to allow your current AIM contact(s) to see your presence.
- Click OK to close the notification.

- Click on Yes.
- Enter as Contact ID the AIM screen name of your contact and click on Add.

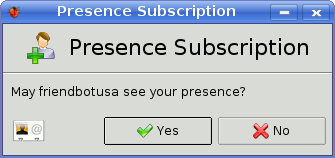
- Normally, your contact wants to see your presence. You probably want to click on Yes.
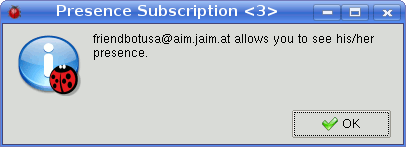
- When your contact allows you to see his/her presence, you will be notified. Click OK to close this notification.
- Your contact is added.

Add Contact
- Log in to post comments
- To add a contact, press the Contact button.

- Enter the Contact ID (chat address) of the contact and click on Add.

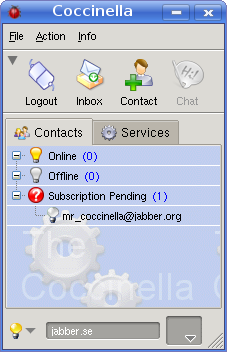
- Until your contact allows you to see his/her presence, your contact will be put in the group Subscription Pending.
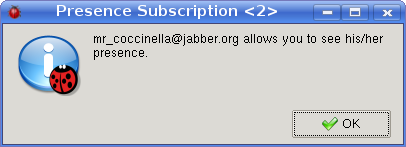
- When your contact allows you to see his/her presence, you will be notified. Click OK to close this notification.
- Normally, your contact also wants to see your presence. You probably want to click on Yes.
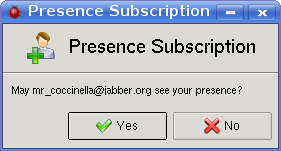
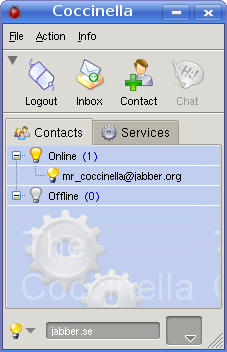
- Your contact is added.
Add ICQ Contact
- To add an ICQ contact, press the Contact button.

- Select ICQ as chat system.

ICQ Transport Registration
These steps are only for when you have not yet entered your ICQ account in Coccinella.- Click on Yes.

- Enter your ICQ number and password. Click on Register.

- Click OK to close the notification.
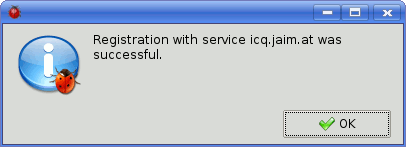
- Click Yes to allow your current ICQ contact(s) to see your presence.

- Click OK to close the notification.

- Click on Yes.
- Enter as Contact ID the ICQ number of your contact and click on Add.

- Normally, your contact wants to see your presence. You probably want to click on Yes.

- When your contact allows you to see his/her presence, you will be notified. Click OK to close this notification.

- Your contact is added.

Add MSN Contact
- To add an MSN contact, press the Contact button.

- Select MSN as chat system.

MSN Transport Registration
These steps are only for when you have not yet entered your MSN account in Coccinella.- Click on Yes.
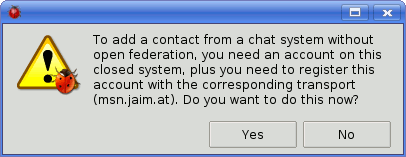
- Enter your MSN address and password. Click on Register.

- Click OK to close the notification.
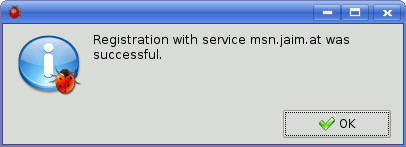
- Click Yes to allow your current MSN contact(s) to see your presence.
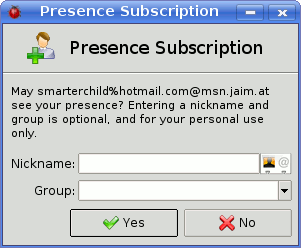
- Click OK to close the notification.

- Click on Yes.
- Enter as Contact ID the MSN address of your contact and click on Add.

- When your contact allows you to see his/her presence, you will be notified. Click OK to close this notification.

- Your contact is added.

Register New Account
- Log in to post comments
- To register a new account, select New Account in the File menu.

- The dialog to register a new account will appear. Select or enter a server. Click on Next.
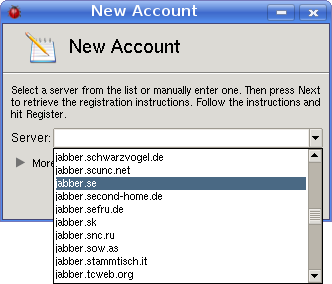
- The dialog will expand. Enter a username and a password. Click on Register.

- Your new account is registered.
